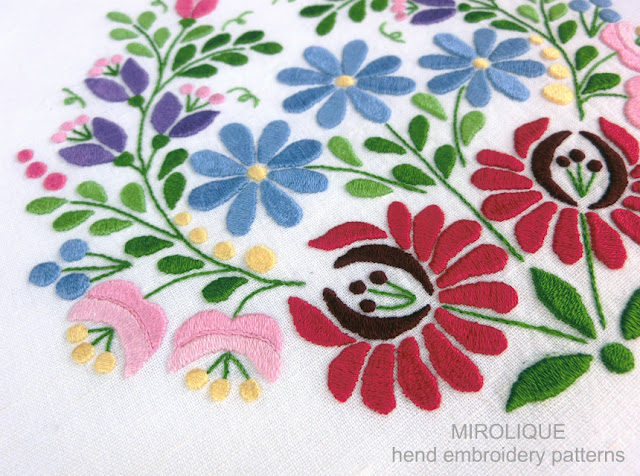
A step-by-step guide to embroidery and pouch sewing.
File contains: sewing instructions for the drawstring pouch with lining; a life-size drawing of the design for transfer to fabric.
Number of pages: 35. Number of Images: 57. Number of drawings: 5. Number of stitches used: 7.
A step-by-step guide to embroidery and pouch sewing.
File contains: sewing instructions for the drawstring pouch with lining; a life-size drawing of the design for transfer to fabric.
Number of pages: 35. Number of Images: 57. Number of drawings: 5. Number of stitches used: 7.
Embroidery dimensions: 8 x 6.5 cm (approximately 3.2 by 2.6 inches).
Pouch dimensions: 22 x 16 cm (approximately 8.7 by 6.3 inches).
File contains:
- recommendations on design transfer from paper to fabric and how to secure the thread;
- a step-by-step illustrated embroidery guide;
- techniques of 8 types of stitches used in this design;
- a life-size drawing of the design for transfer to fabric.
You will learn the following stitches and techniques:
- Stem stitch
- Split back stitch
- Backstitch
- Woven filling stitch
- Fly stitch
- Long and short stitch
- Satin stitch
The floss colors listed in this tutorial are DMC.
You will need: fabric (recommendation on choice are also in the file); DMC threads; embroidery hoops; a sharp #10 needle: scissors; a tapestry #26 needle; tracing paper for design transfer; carbon paper or a fabric marker (depending on the method of design transfer).
For the pouch - fabric, lining, string with stoppers, sewing thread, pins, scissors, a ruler, washable or disappearing marker for fabric, sewing machine.
*Due to the nature of the PDF format, there are no refunds on instructions/patterns.
You will need Adobe Acrobat Reader to use this file. The software can be downloaded for free at http://www.adobe.com


Комментариев нет